Git
Git is a source control tool used by developers and us. GitHub and GitLab are websites that can host git projects.
Forcing Changes
Unless you know what you are doing, please DO NOT use -f or --force when pushing changes. This has a high potential to delete or break things, and can not be easily undone.
Basics
Cloning
If you wish to clone an existing repository from our GitLab, you will need to make sure your authentication keys are properly setup.
Setting up authentication
- Open Command Prompt.
-
Type "ssh-keygen -t ed25519", and follow the prompts.
- You do not need to set a name, though it is recommended if you plan on having multiple keys.
- You do not need to set a password.

-
Both a
ed25519anded25519.pubfile should be generated at the directory that was specified.(C:\Users\imodm/)in the example.Public and Private
The file ending in
.pubis your public key. The file that does not have that ending (with the same name) is your private key. Do NOT share the private key. -
Go to GitLab, at the top right click on your profile picture.
-
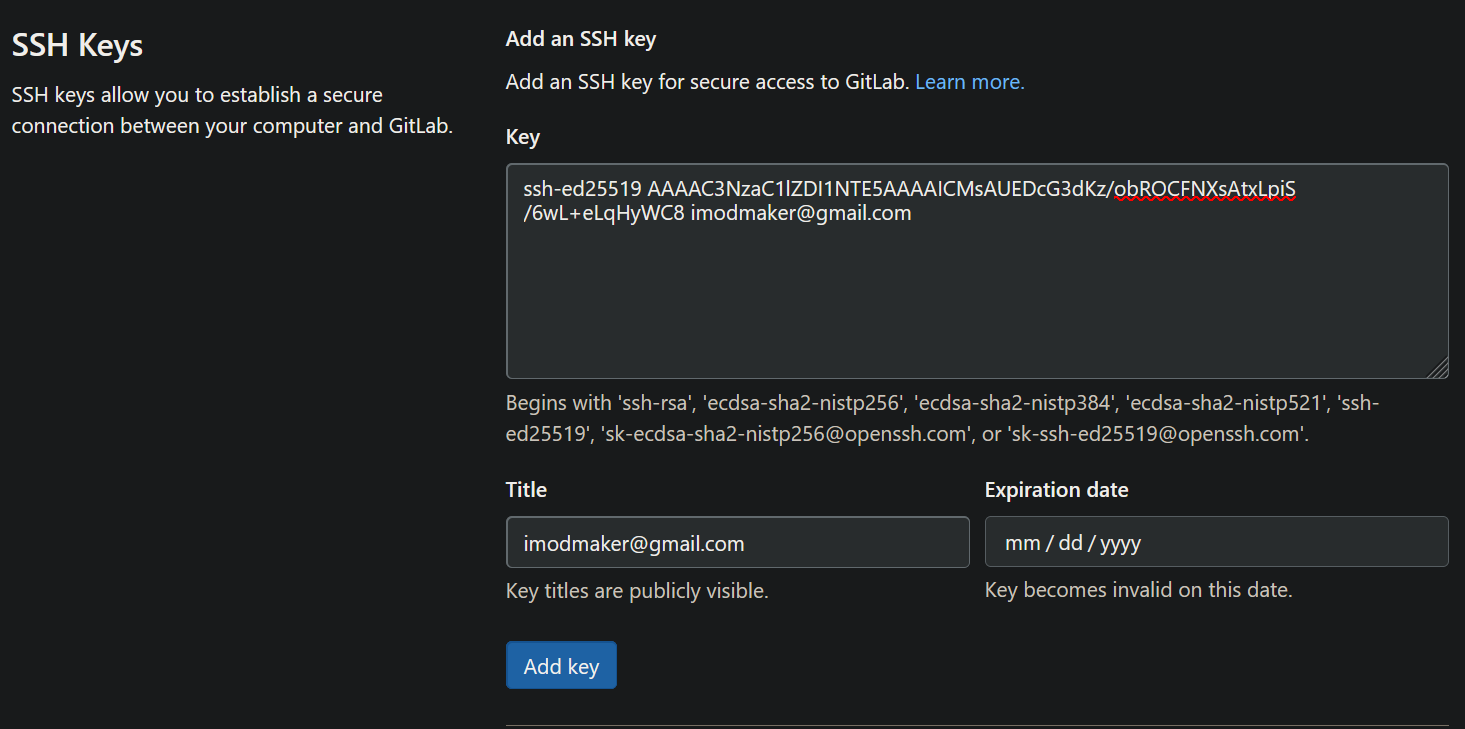
Click Preferences -> SSH Keys.
-
Copy the contents of the generated
ed25519.pubfile, and paste the text into theKeyfield.- It is recommended you set a Title.
- You are not required to set an expiration date.
-
Click "Add Key"
- In GitLab, navigate to the repo you wish to clone.
- In VSCode (or CMD prompt), navigate to the folder you wish to store the cloned repository into.
- Copy the repository URL (e.g:
https://gitlab.edgegamers.io/source/csgo/jailbreak) - Type
git clone <url>in VSCode / CMD. - If all goes well, the terminal should output some text about cloning into a folder.
- If not, you may have to move the SSH key into the
.ssh/folder (e.g:C:\Users\imodm\.ssh\).
You can read more about authentication here
Branches
Each git project has a master or main branch, this is generally the branch that is used for production. For example, if you wanted to add a map to the Jailbreak git repository, you would create a branch of the master branch. Branches should follow the naming convention of type/name (eg: feature/dsranks, fix/consolespam, or update/gunammo).
You can imagine a branch and a git repository as a cake. The master branch is the cake that everyone bases their development off of. If you wanted to add sprinkles to the cake, you could make a new branch (feature/sprinkles), and commit (add a change) to the cake. Each branch would be a different snapshot of a cake, with each cake having a "commit history" (change history) which shows how the branch got from the master branch to its current state.
Once you've finalized the sprinkles and you're happy with the way they look, you can make a merge request from your feature/sprinkles branch into master.
If someone else comes along and wants to add candles to the cake, they would do the same steps.
- Create a new branch based off master (
feature/candles) - Commit their changes on their branch
- Merge their branch into master
With git you can also make a branch off other branches that aren't master. For example, if someone wanted to change the amount of candles on the cake, they could make a new branch update/candles off of the feature/candles branch.
Info
Source control in general can get very complicated. Fret not, there are lots of resources for using git. The more you work with git the more comfortable you will get with it. Git is a very powerful tool that all developers of our servers should get familiar with.
Creating a branch
- Checkout to the master branch (
git checkout master) - Create a new branch from the master branch (
git switch -c feature/arcademap) - Make the changes to the files
- Commit the files
- If you are using VSCode or an IDE that supports Git, you can click on the
+to commit the files. - Otherwise, you will have to manually commit these files (git add [file]orgit add .to add all files).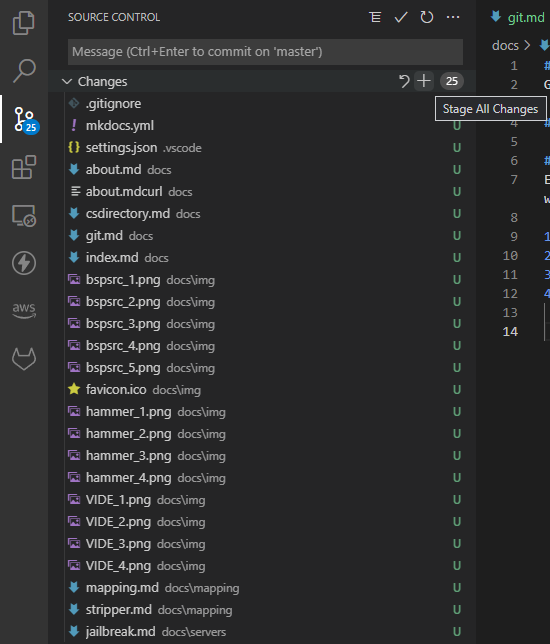
- Push the changes (
git push -u origin feature/arcademap) --u origin feature/arcademapis needed if you are pushing a new branch to the gitlab / remote.
Branches can get messy sometimes, you'll often run into a branch of a branch of a branch. Please make sure you are cleaning up branches and deleting them when is appropriate.
Rebasing
Each branch is standalone from other branches. Oftentimes you may run into the event where the master (or dev) branch has been updated, but your branch is behind. To fix this, you must re-base your branch onto the master branch. If you imagine your branch and your changes as a cake, you are effectively picking up the cake, moving the master branch underneath, and re-basing your branch onto the plate (the master branch).
Rebasing onto dev
- Make sure you are checked out to your branch (
git checkout feature/arcademap) - Re-base your branch onto dev (
git rebase dev) - Push the rebase (
git push)
Merging
Once you're satisfied with your changes on your branch, you'll want to merge them into the dev (or equivalent) branch for testing.
Merging into dev
- Checkout to the branch you wish to merge into (
git checkout dev) - Merge your branch into the dev branch (
git merge feature/arcademap)
Squashing
It is generally recommended that you squash your changes so that your branch shows as a single commit rather than adding all your branche's commits to the dev branch.
You can achieve this by doing
git merge --squash feature/arcademap instead of git merge feature/arcademap.
- Push the changes (
git push)