Mapping
Hammer
Hammer is the map editing tool used for most source maps. There is also Hammer++, an unofficialy community-supported version of Hammer. You can read an indepth guide here. Important takeaway notes for general mapping is understanding entities, input / output, and scripts.
Entities and Brushes
Entities and Brushes are similar in that entities interact with brushes. Entities are mobile objects such as players, props, chickens, etc. Brushes are objects such as ladders, triggers, and water.
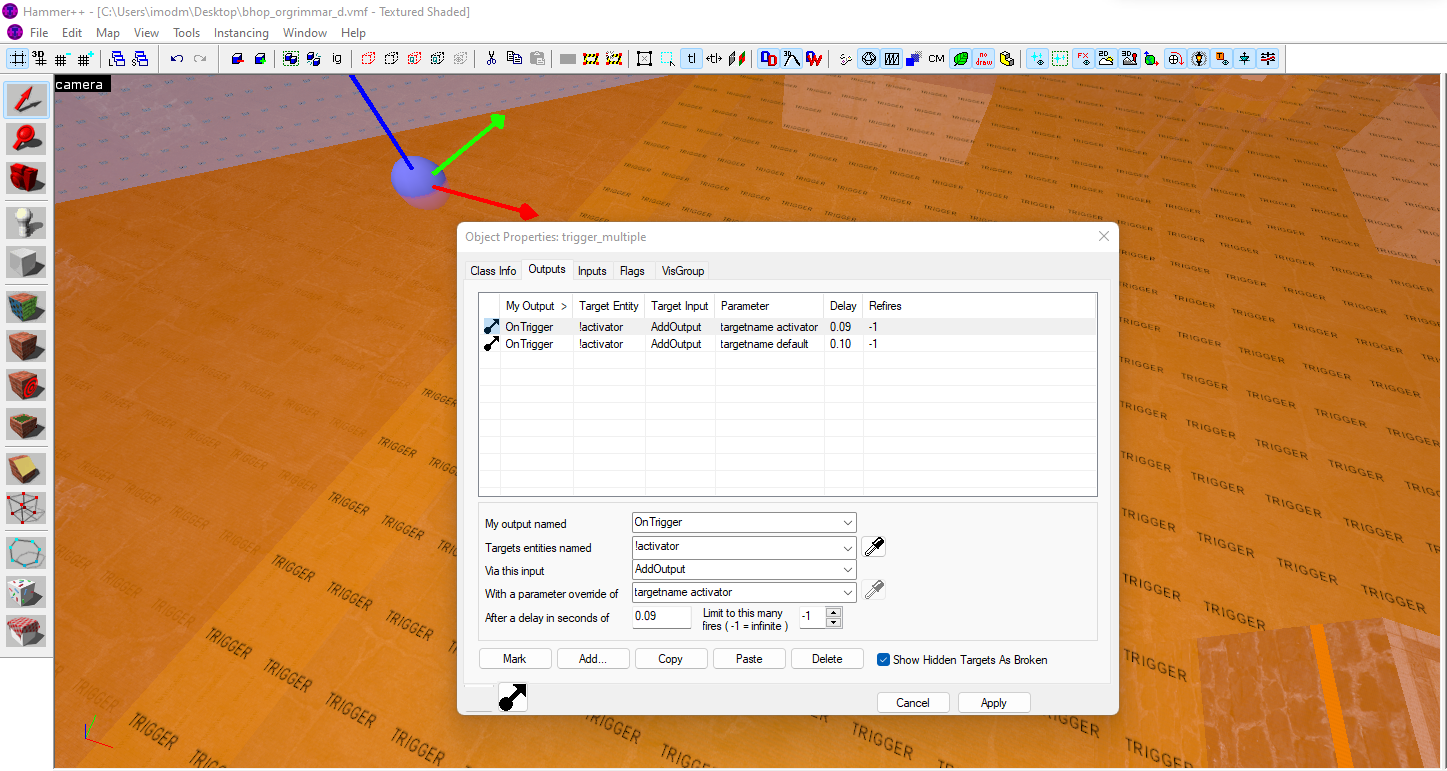
Both entities and brushes support input / output. Targets such as !self target the object itself, !activator targets whoever triggered the object, etc.
Input / Output (I/O)
Inputs and Outputs are a key function of maps. They can be used to make BHops, Triggers, Minigames, and many other possibilities. The vast majority of maps use inputs and outputs.
An important note is that every output that an entity has counts as an input for another entity. 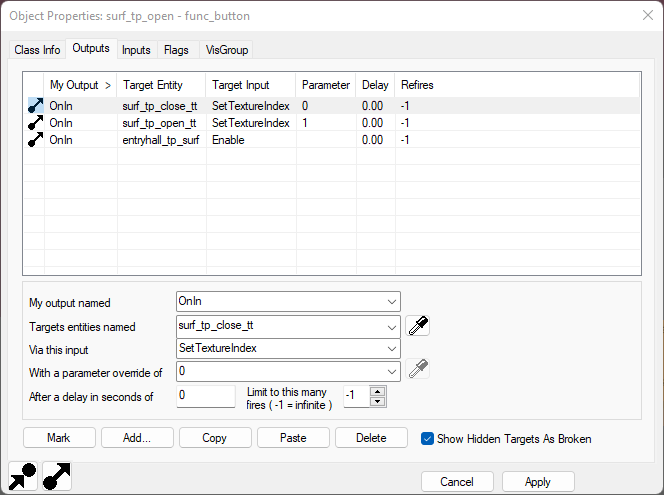
Scripts
While not as used as Inputs and Outputs, scripts are a significantly more powerful version of inputs and outputs. Scripts can be used to better automate and control entities and brushes. You will generally find scripts in more complex maps, which are generally exclusive to Jailbreak. The language that scripts use depends on the platform, with the large majority of them using Squirrel.
Example Script
Damage<-0;
MAX_DAMAGE<-20;
MIN_DAMAGE<-0;
DamageSignTT<-null;
DAMAGE_TO_TEXTURE <- {[0] = 0, [5] = 1, [10] = 2, [15] = 3, [20] = 4, [25] = 5, [50] = 6, [75] = 7, [100] = 8};

MAX_WINNERS<-32;
MIN_WINNERS<-3;
WinnersSettings<-4;
Winners<-0;
WinnersSettingTT<-null;

DEBUG_PRINT<-false
function debugprint(text)
{
  if (!DEBUG_PRINT || GetDeveloperLevel()   == 0) return;
  printl("*************" + text + "*************")
}

function OnPostSpawn() //Called after the logic_script spawns
{
  EntFireByHandle(self, "RunScriptCode", "Setup()", 0.5, null, null);
}

function Setup()
{
  DamageSignTT = Entities.FindByName(null, "decathlon_damage_sign_tt");

  Damage = 0;
  EntFireByHandle(DamageSignTT, "SetTextureIndex", DAMAGE_TO_TEXTURE[Damage].tostring(), 0.0, null, self);
}

function AddToDamage(toAdd)
{
  Damage += toAdd;
  if (Damage > MAX_DAMAGE) Damage = MAX_DAMAGE;
  if (Damage < MIN_DAMAGE) Damage = MIN_DAMAGE;

  EntFireByHandle(DamageSignTT, "SetTextureIndex", DAMAGE_TO_TEXTURE[Damage].tostring(), 0.0, null, self);
  if (Damage == 0) {
    EntFire("decathlon_damage", "Disable", "", 0.0);
  } else {
    EntFire("decathlon_damage", "Enable", "", 0.0);
  }
  EntFire("decathlon_damage", "SetDamage", (Damage*2).tostring(), 0.0);
}


function UpdateTeleports()
{
  local teleportDesinationEntities = [EntityGroup[0], EntityGroup[1], EntityGroup[2]];
  local winnersDestination = EntityGroup[3];
  local losersDestination = EntityGroup[4];
  local teleportDestination = losersDestination;
  local winTeleport = EntityGroup[5];

  if (Winners < 3)
  {
    debugprint("Setting teleportDestination to podium " + (Winners+1));
    teleportDestination = teleportDesinationEntities[Winners];
  }
  else if (Winners < WinnersSettings)
  {
    debugprint("Setting teleportDestination to winners podium");
    teleportDestination = winnersDestination;
  }
  else
  {
    debugprint("Setting teleportDestination to losers podium");
  }
  debugprint("podium name: " + teleportDestination.GetName());
  EntFireByHandle(winTeleport, "SetRemoteDestination", teleportDestination.GetName(), 0.0, this, this);
}

function AddToWinners()
{
  Winners++;
  UpdateTeleports();
}

function ResetWinners()
{
  Winners = 0;
  UpdateTeleports();
}

function AddToWinnersSetting(toAdd)
{
  WinnersSettings += toAdd;
  if (WinnersSettings > MAX_WINNERS) WinnersSettings = MAX_WINNERS;
  if (WinnersSettings < MIN_WINNERS) WinnersSettings = MIN_WINNERS;

  if (WinnersSettingTT == null)
  {
    WinnersSettingTT = Entities.FindByName(null, "decathlon_winners_sign_tt");
  }

  EntFireByHandle(WinnersSettingTT, "SetTextureIndex", WinnersSettings.tostring(), 0.0, null, self);

  if (Winners > 0)
  {
    UpdateTeleports();
  }
}
Map Security
Both I/O and Scripts can be abused. It is the responsibility of each Game's Leadership to vet maps and ensure they do not contain malicious content.
Hammer Inaccuracies
The Hammer editor has some inaccuracies, specifically with coordinates. If you are using Stripper to target entities, you may need to adjust the coordinates. Use VIDE to get more accurate coordinates for entities. Similarly, if you are using Hammer to place brushes / entities, they will be offset by a few units.
Setting up Hammer
Pre-requisite
You must have either CS:Source 1.6 or CS:GO installed. (You may be able to run Hammer without both if you have a Source game installed).
- In Steam, type "SDK".
Counter-Strike: Global Offensive - SDK(orSource SDK), should show up as a result, click Install and wait for it to download. - Once installed, click "Play", you should see a window similar to the one below.
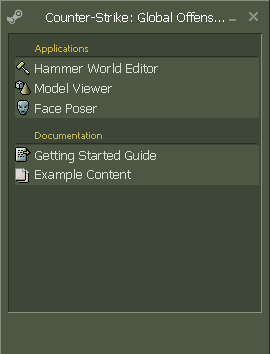
- Click "Hammer World Editor", and Hammer will open.
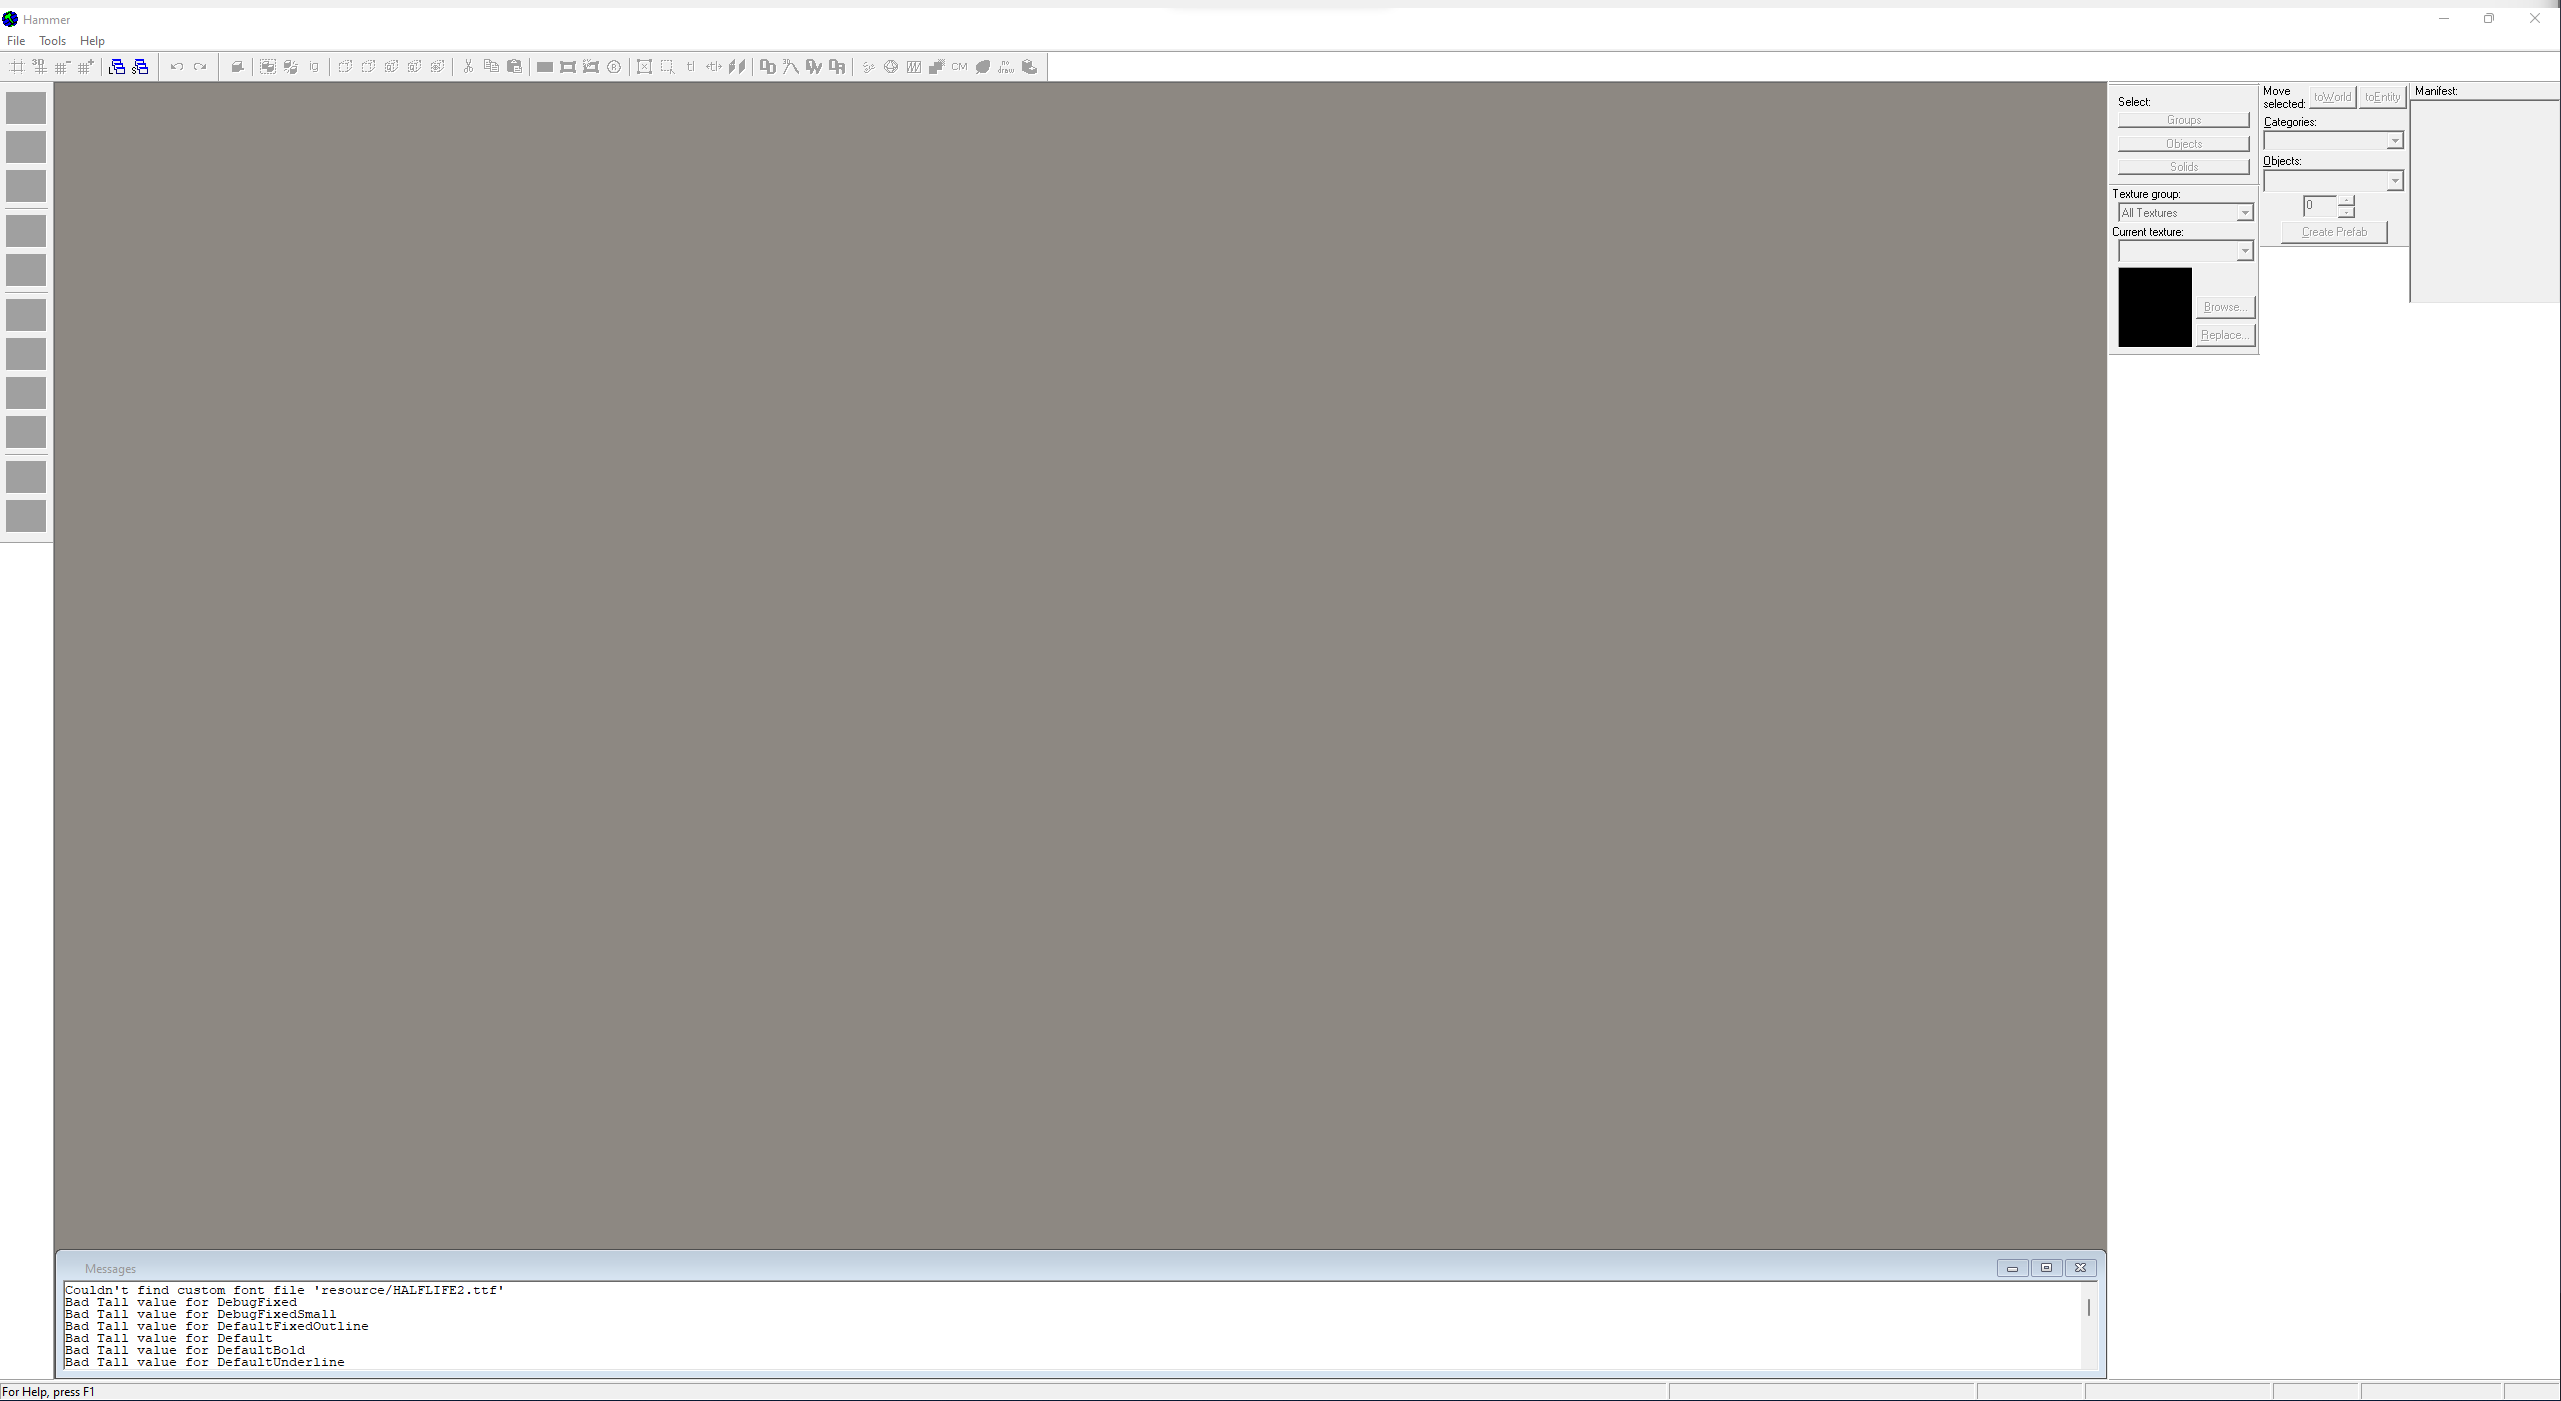
- To open a BSP file, click File -> Open (Ctrl + O) -> Navigate to your BSP file -> Open.
- Hammer should open the BSP file.
Decompiling
Source maps come in two formats, BSPs and VMFs. BSPs are compiled VMFs. You can use tools to decompile BSPs into VMFs, though there are some limitations and complications. The recommended tool to use to decompile BSPs is BSPSource.
Decompiling
- Download BSPSource from here.
- Unzip the contents, place them somewhere you want to keep the program.
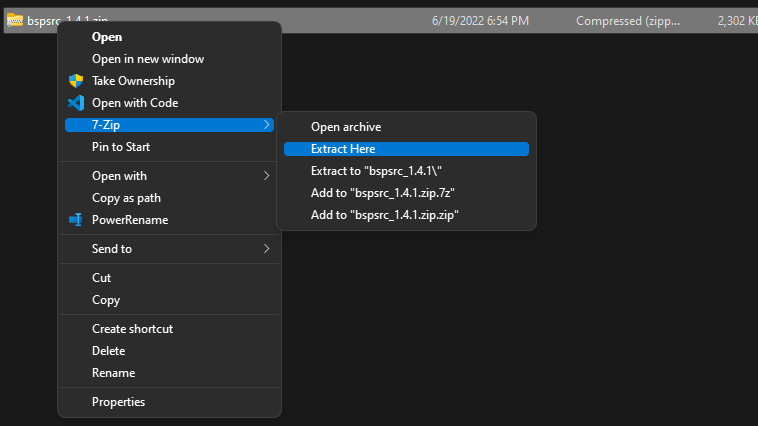
- Run
bspsrc.bat, this should open up a BSPSource window.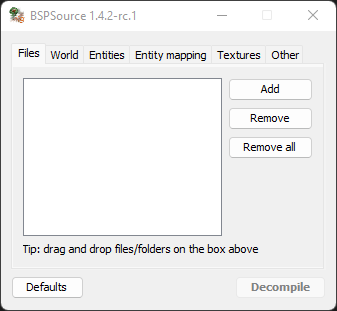
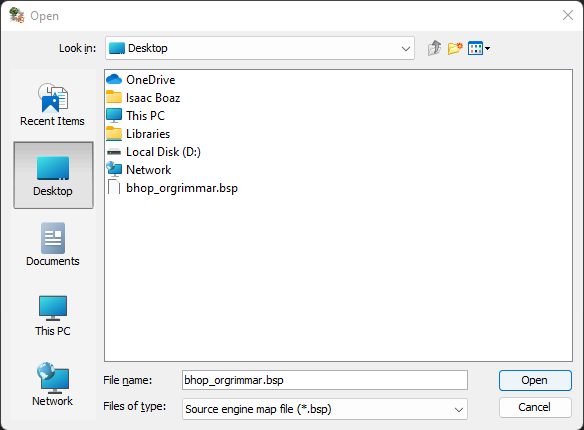
- Click "Add", this will open up a File Selection dialog.
- Navigate to the BSP you want to decompile, and then click "Open".
- If you require the resources (images, scripts, sounds, etc.) in the BSP, click "Other".
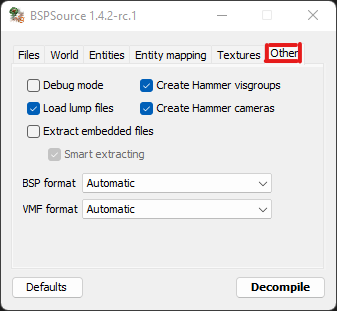
- Enable the "Extract embedded files" option, and then click "Decompile".
- Set the target destination where you wish, make sure it is an easy to access location.
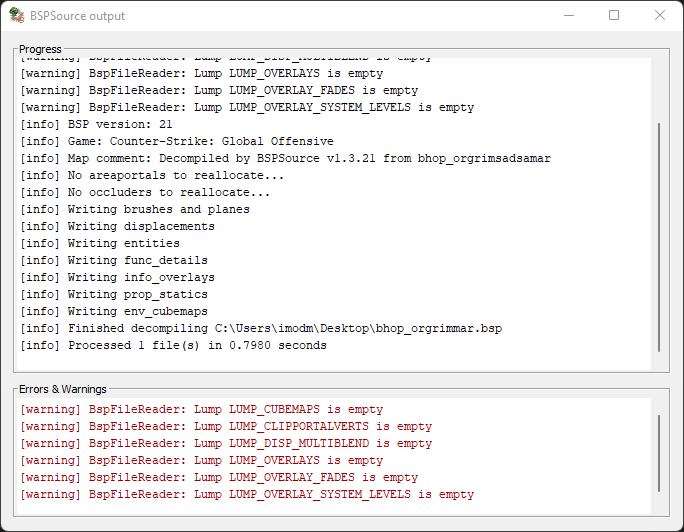
- If you extracted the embedded files, there will be a folder in the same location as the VMF.
- To make sure that Hammer can find these resources, you will want to copy them into your CS folder.
VIDE
VIDE is a separate decompiling tool that is used in conjunction with BSPSource. VIDE is more specific to entities and packing/unpacking resources.
Setting up VIDE
Pre-requisite
VIDE only works with BSPs. See Decompiling to generate one from a VMF.
- Download VIDE from here.
- Extract the files into a folder you want to keep the program.
- Run
VIDE.exe, this should open up a VIDE window.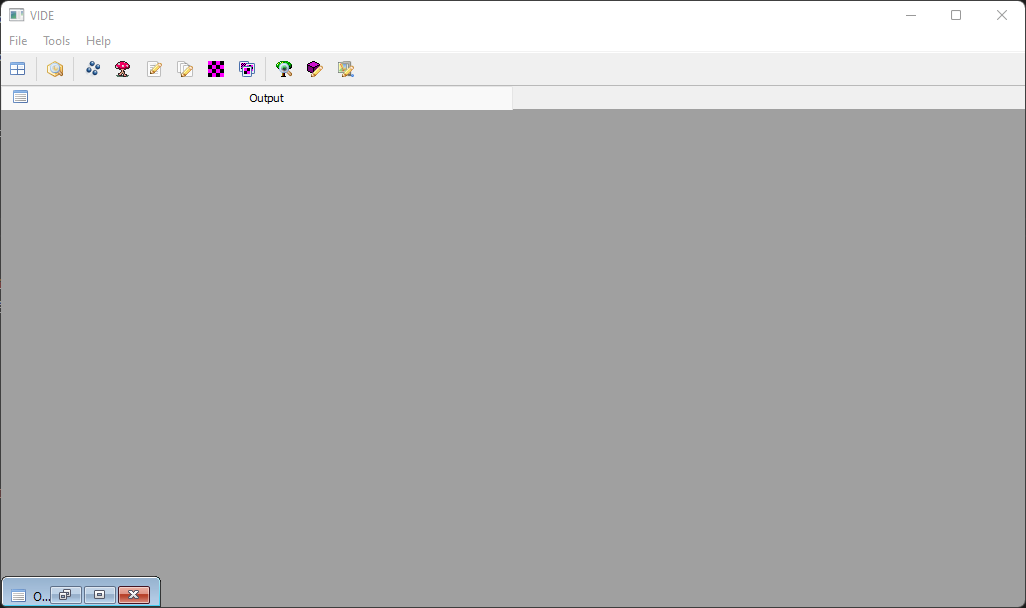
- To decompile a BSP and get accurate entity coordinates, click "Entity Lump Editor".

- A new smaller window will open within VIDE itself. Click File -> Open -> Navigate to your BSP -> Open.
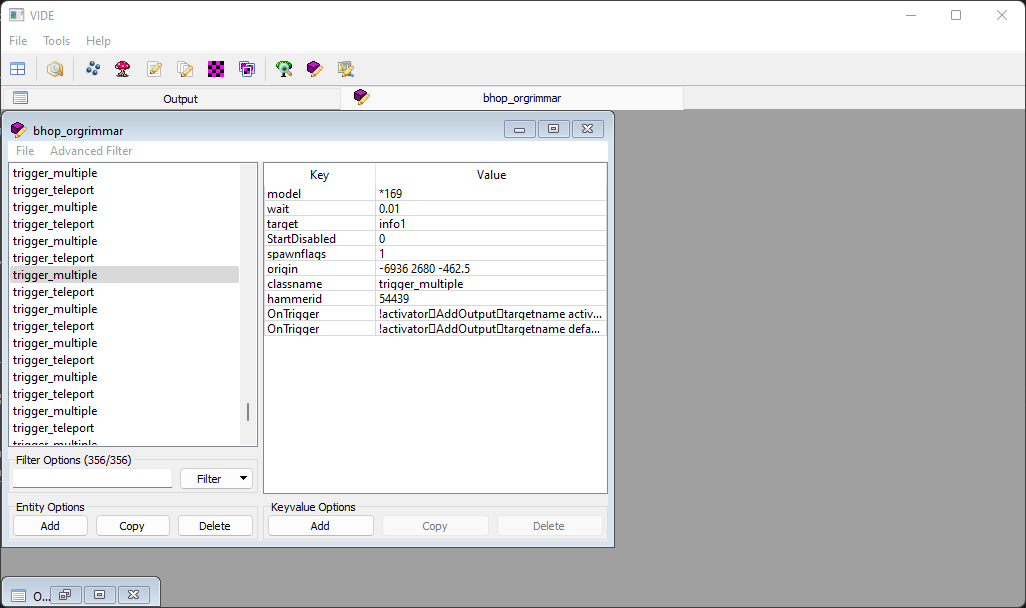
- Here, we have a list of all entities and brushes in the BSP. This list is what should be used for Stripper.
Stripper
Stripper is a tool used by EdgeGamers to quickly modify maps without having to decompile and recompile them. While limited, stripping maps is generally recommended over re-compiling them. You can view an in-depth Stripper guide here.
Stripper Seperators
Stripper uses invisible characters in I/O to separate parameters. If you are copying straight from VIDE (eg below), then this character will be automatically copied. If you are not copying, you will need to manually copy this character.

Removing Entities
To remove an entity, you can use the filter block.
filter: {
  classname: "func_button"
  targetname: "button_1"
}
filter: {
  classname: "func_button"
  origin: "51 987 -50"
}
Adding Entities
To add an entity (eg. Spawnpoint) you can use the add block.
add: {
  classname: "info_player_terrorist"
  origin: "584 10 -56"
  angles: "180 270 0"
}
Changing Entities
To modify an entity, you use the modify block combined with match, insert, delete, and replace.
Changing button's name
modify: {
  match: {
    classname: "func_button"
    targetname: "dk_s"
  }

  replace: {
    targetname: "deathcrate_start"
  }
}
Here we use replace because the entity already has a targetname, and we simply want to change it.
Adding an output to an entity
modify: {
  match: {
    origin: "587 -88 12"
    classname: "trigger_once"
  }

  insert: {
    OnStartTouch: "SLP_Relay7CancelPending0-1"
  }
}
Here we use insert to insert an additional output to the entity. Note that it is hard to separate the targetname, method, delay, and max times due to the invisible character.
Changing the outpot of an entity
modify: {
  match: {
  "origin" "-1768 864 344"
  "classname" "logic_auto"
  }
  delete: {
  "OnMapSpawn" "cell_button1Unlock20-1"
  "OnMapSpawn" "cell_button2Enable20-1"
  }
  insert: {
  "OnMultiNewRound" "cell_button1Lock5-1"
  "OnMultiNewRound" "cell_button2Disable5-1"
  "OnMultiNewRound" "cell_button1Unlock20-1"
  "OnMultiNewRound" "cell_button2Enable20-1"
  }
}
Since there can be multiple outputs to the same input, we need to delete all the OnMapSpawns and insert multiple OnMultiNewRounds.
Changing where a player is looking when teleported
modify: {
  match: {
  "classname" "info_player_terrorist"
  }
  replace: {
  "angles" "0 270 0"
  }
}
Depending on the type of teleport, you may want to keep where the player was looking at before being teleported. You would want to set UseLandmarkAngles to 1 to achieve this behavior.
Modifying the size of a trigger

Minimap (TODO)
Testing Maps
Map testing is an important part of most servers development. Testing a map both locally and on a development server is important to ensure server stability and fun gameplay.
Testing Locally
- Download the map or subscribe to it from the Steam Workshop
- If you downloaded the map, move it to your
csgo/mapsfolder. - Open CS:GO
- If you downloaded the map, open up console and then type
map [map name] - Otherwise, click on Play > Workshop Maps > Select the map.
Testing on Dev
- The map must be on the Steam Workshop
- Open the Steam Workshop link (eg:
https://steamcommunity.com/sharedfiles/filedetails/?id=252961216) - Copy the ID that is at the end of the URL (
252961216) - Go into the dev server
- Open up console
- Type
sm_rcon host_workshop_map [ID](eg:sm_rcon host_workshop_map 252961216)
Things to look for
- Basics
- Minimap - All maps should have a minimap.
- HDR - All maps should have HDR enabled (type
mat_hdr_enabledin console to check).
- Gameplay
- Make sure the gameplay is sufficient. Things like balance, appeal, player spawns, decor, etc.
- If relevant, validate any secrets work as intended (and do not cause server issues).
- Malicious Content
- Decompiling the map is strongly encouraged, as it is very easy to hide inappropriate or malicious content in a map.
- Ensure all map images, VScripts, brushes, messages, etc. follow our Code of Conduct and are not malicious.
Adding Maps
Adding maps involves uploading the map (unless the map is already hosted publicly), making an issue on our GitLab, and updating a few config files.
- Upload the
BSPof the map (or get a link to the map). We do not need aNAVorVMF. - Create an issue in the corresponding server's gitlab. (Eg: Jailbreak Maps go in the Jailbreak repo, Surf goes in surf, etc.)
- Make sure you include the map's download URL.
- Once the map has been uploaded (tech will respond):
- Update the
mapcycle.txtthat can be found in thecfgfolder (eg:jailbreak/cfg/mapcycle.txt). - If you are on surf or KZ, add the map (and its tier) to
setup/umc_mapcycle.txt
- Update the
- Make sure you create a stripper file for the map, following the basic format.
Adding Maps (WISP)
With the new WISP system, you are able to add maps directly to the server.
Example
- Get the map's BSP.
- If the BSP is UNDER 150 MB, compress it to a bz2 format. (eg:
map.bsp.bz2) - Upload the BSP itself (NOT the bz2) to the
[server]/mapsfolder on WISP. - Upload an empty NAV file (you can copy an existing one) to the
[server]/mapsfolder on WISP. - Using the credentials provided in your game's tech channel, upload the bz2 (or bsp if the map is > 150 MB) to the S3 container under the appropriate game (eg:
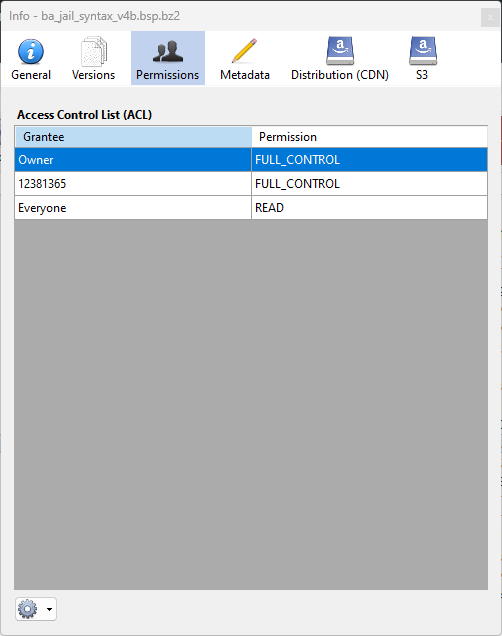
csgo/jailbreak/maps). (It is recommended you use CyberDuck to upload the file). - Update the access policy for the S3 container to allow
EVERYONEaccess to read the file, it should look similar to the following: - Verify that you can download the map through your web browser. (eg:
fdl.edge-gamers.com/csgo/jailbreak/maps/jb_undertale_v1e.bsp.bz2) - Once the above has been completed, add the map name to the
csgo/cfg/mapcycle.txt
Adding Maps (Docker)
The Docker method has similar steps to the WISP method, but has a few differences.
- Get the map's BSP.
- If the BSP is UNDER 150 MB, compress it to a bz2 format. (eg:
map.bsp.bz2) - Upload both the BSP and the BZ2 (if you compressed it) to the
[server]/mapsfolder (see step #5 above). - Update the access policy for the S3 container to allow
EVERYONEaccess to read the file, it should look similar to the following: - Verify that you can download the map through your web browser. (eg:
fdl.edge-gamers.com/csgo/jailbreak/maps/jb_undertale_v1e.bsp.bz2) - Once the above has been completed, add the map name to the server's
mapcycle.txtfile through git. - Merge or otherwise commit the changes to the server's dev branch.
- The server should automatically update with the new map. Join the server and test the map.